Black History Month and Cricut Infusible Inks
This is a sponsored conversation written by me on behalf of Cricut. The opinions and text are all mine.
Hello and Happy New Year Welcome to 2020 and new decade!
February is here and a very special month for me as an African-American as we celebrate Black History. Although I celebrate all year long there is extra emphasis in February. This year I was chosen to partner with Cricut in celebrating Black History Month with this project using Cricut Infusible Inks!!
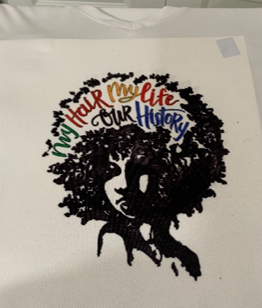
The image I chose of of a African-American women celebrating our crowns! This post will also introduce us converting an image to line drawings for use with Cricut Infusible Inks.
Materials Needed for this Project:
- Cricut EasyPress 2
- Cricut Maker or Cricut Explore Air 2
- Butcher paper / Brown Paper
- Infusible Ink Pen / Marker design, face down
- Cricut T-shirt Blank
- White Cardstock (80 lb) or 4 layers butcher paper
- Cricut EasyPress Mat*
- Cricut Heat Resistant Tape
- Lint roller
Lets Get Started!
1. Open Cricut and choose a new project
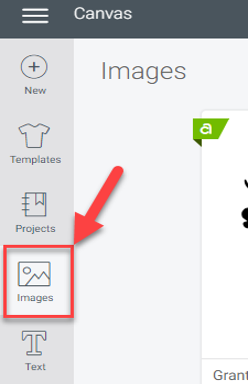
2. Once in the new project, navigate to the left and choose images
3. In the images search bar type in your search keywords mine are “Black History Month”

4. I choose the image “My Hair My Life My History” – I also went to templates and choose a T-shirt to see exactly how it would fit on the T-shirt.
5. Size you image to fit on the Laser paper, I sized mine to be 7.25 x 8.5.
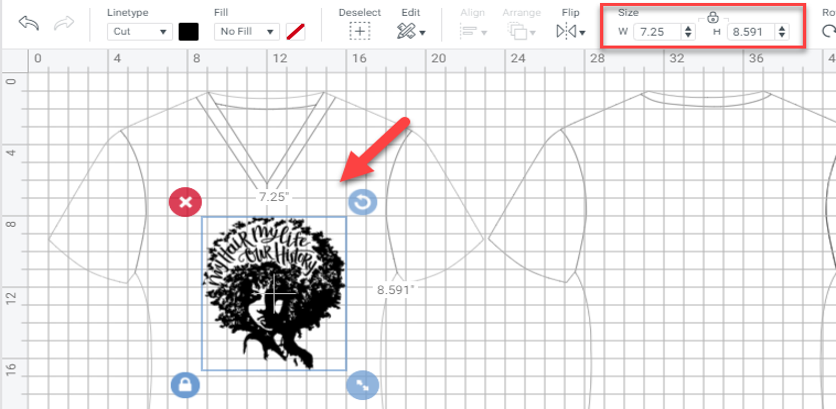
6. Once the image is in place navigate to the menu bar and locate “Linetype”
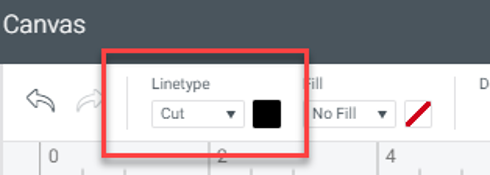
7. In the drop down chose “Line type” and it instantly changes your drawing into line drawing.

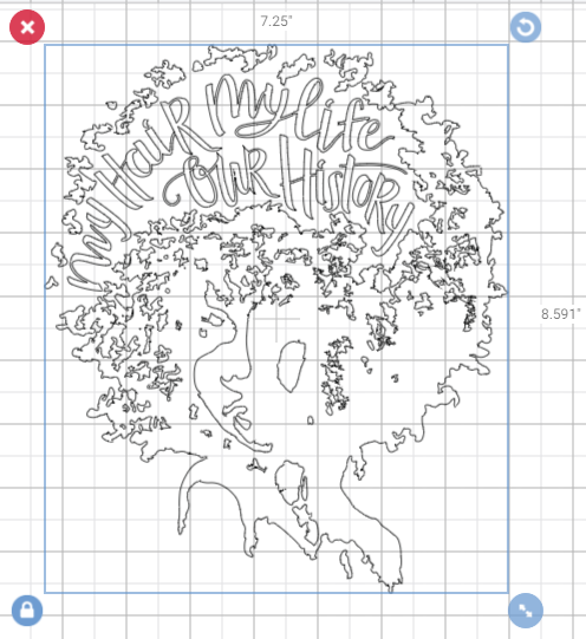
8. Save it then send it to “Make”
9. Change your canvas size to 8.5” x 11” and mirror your image
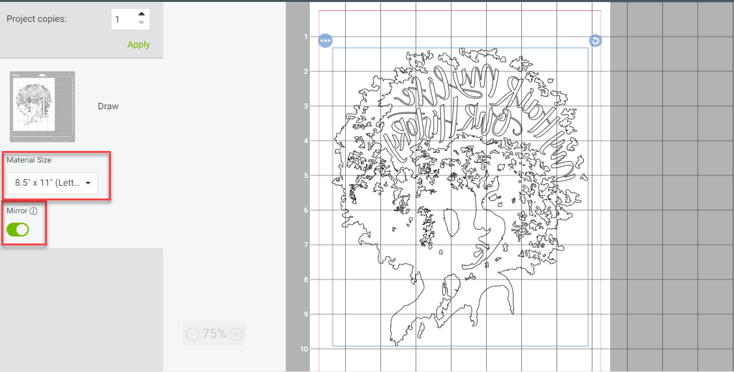
10. Turn your machine on then click continue. Let your machine connect then choose copy paper.
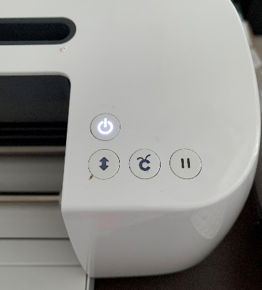
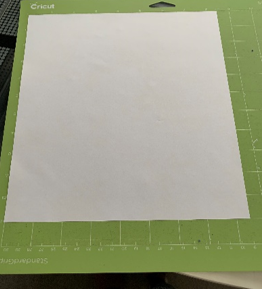
11. Insert the Infusible Ink black .04 point pen into the first on the Cricut Maker and Press Go. The pen will create an outline of the image above that you can then color in with the other Infusible Inks that you wish.
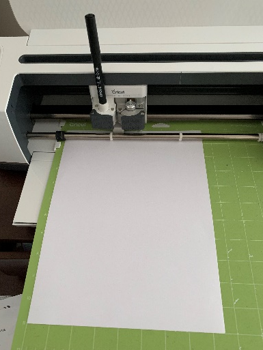
12. One the image is done carefully peel the copy paper and the image off the mat. Place the paper face down and peel the mat versus peeling the paper from the mat.
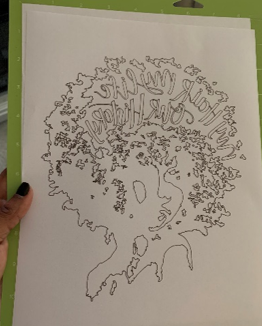
13. Color in your image as you wish.. (Do not be afraid to apply color. The more the color is applied the richer your image will be. Also let it sit and go back over your colors for more saturation.)
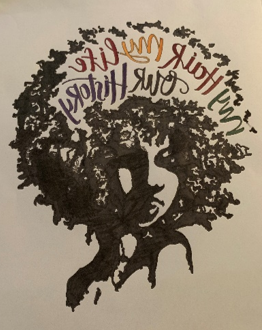
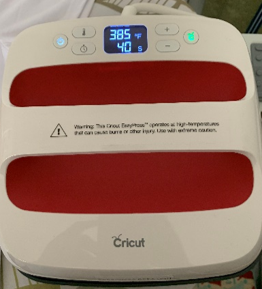
14. Once you are done with color turn on your EasyPress 2 – in the 9 x 9 size as it’s the perfect size for T-shirts. If you forget the settings you can go to the Cricut Website Here and choose your materials and medium and it will reveal the settings: https://cricut.com/en_us/heatguide
15. For the most successful transfer there is a stacking order:
Place the EasyPress Mat down first on a heat proof setting preferably your iron board.
Inside Cricut T-shirt Blank:
Place a piece of White Cardstock (80 lb) or 4 layers butcher paper (the cardstock absorbs the ink)
Infusible Ink Pen / Marker design, face down
Butcher paper – Absorbs the ink (alternatively you can use brown paper, you will not be able to re-use it) – Results once your image is pressed
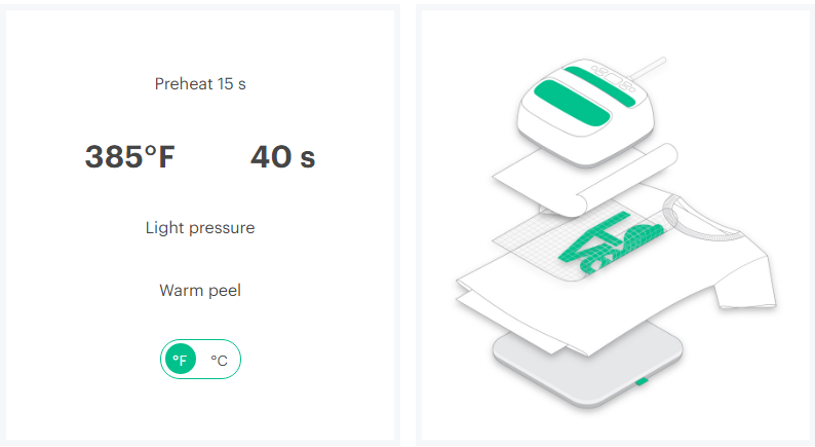
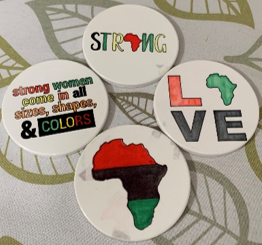
16. Be sure to use the specific recommended heat setting for each material you use. For instance: the heat settings are 385 degrees and 40 seconds and light pressure for a shirt but the settings are 400 degrees and 240 second and no pressure for the ceramic coasters.
17. Once the image has cooled you may lift the butcher paper and reveal your beautiful project!
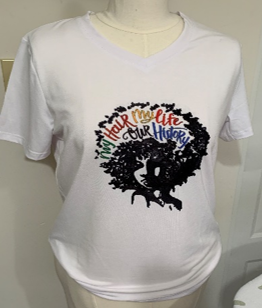
I did some coasters as well!
Friendly Tips and Reminders!
- Do not hesitate to read the instructions several times
- Do use the specific materials as indicated – laser paper, Cricut Infusible Inks, Cricut shirt, butcher paper (or brown paper), card stock, and Cricut EasyPress 2.
“This blog accepts forms of cash advertising, sponsorship, paid insertions, and / or other forms of compensation. The compensation received may influence the content, topics or posts made in this blog. All advertising is in the form of advertisements generated by a third party ad network. Those advertisements will be identified as paid advertisements.”
de945714fa746b54af1f32a46e195ef078cdf643d74fc07dee
