Tag: #burda

DIY Aquazzura Like Pom Pom Sandals


For the past few seasons, pom pom sandals have been the rave! Luckily, it does not appear this rave will go away anytime soon! We.simply.love.them! They are a great addition to any wardrobe whether they are flats, mid-heel, or high heels.

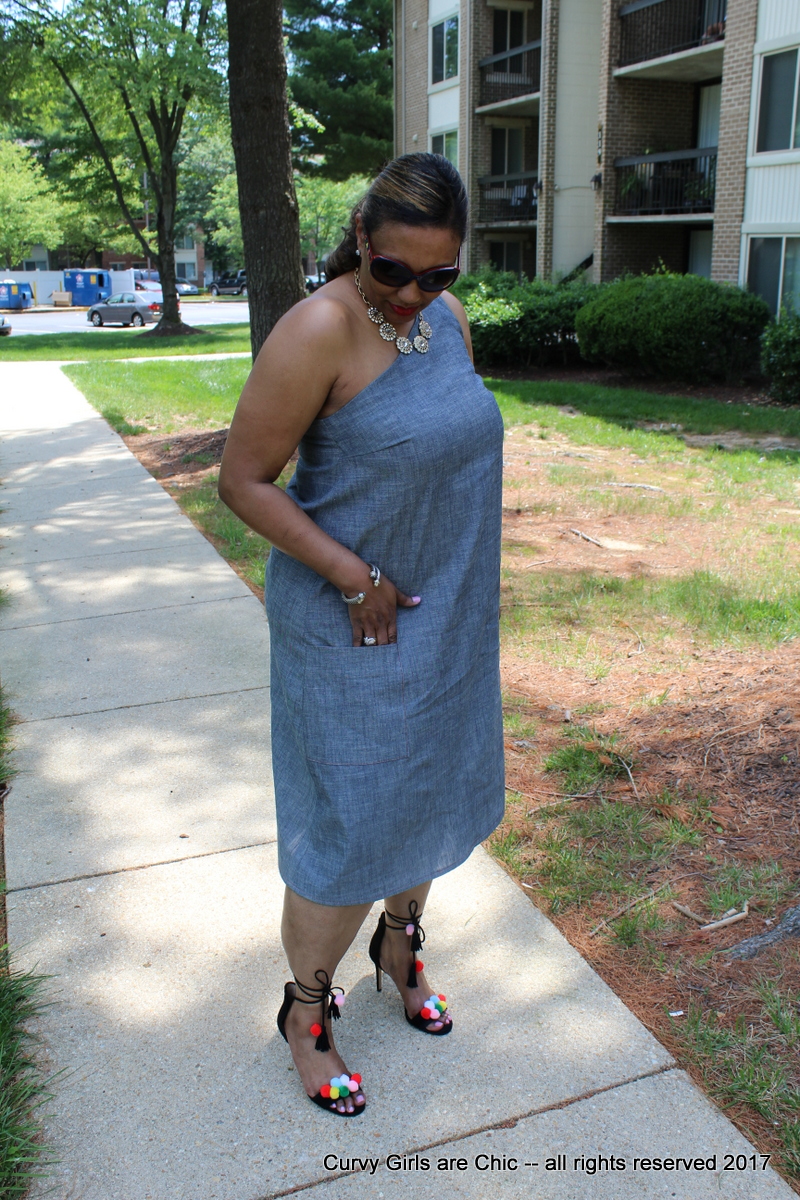
Aquazzura was one of the first designers to re-introduce these to the fashion world followed by Sam Edelmen with a lower price. I purchased the Sam Edelman flats in the neutral color last season, here they are shown in a sailor blue.  I purchased them last year for $100 bucks and they were worth it.

This Spring, I looked at a pompom in a slightly higher heel and did not find quite what I was looking for without spending fabric money! So I thought, why couldn’t I do this myself? I mean I am the Do it Yourself Queen and all Queens must wear the crown proudly. I skimmed a few blogs and YouTube videos for the “DIY” versions and it is so super simple — just some glue and some pom poms! Follow the instructions below so you can have a pair as well!

Do it Yourself Instructions
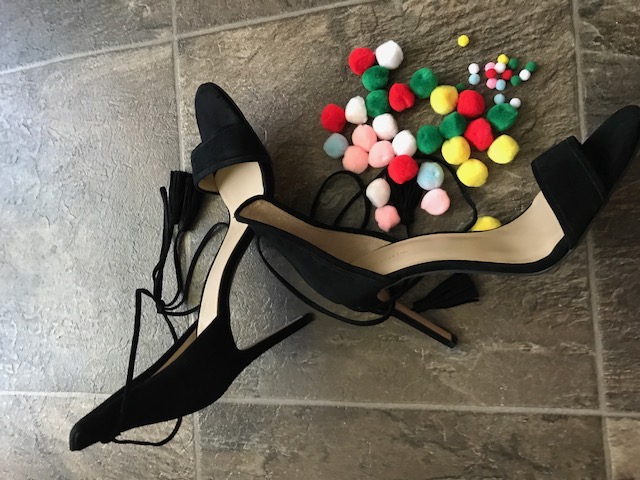
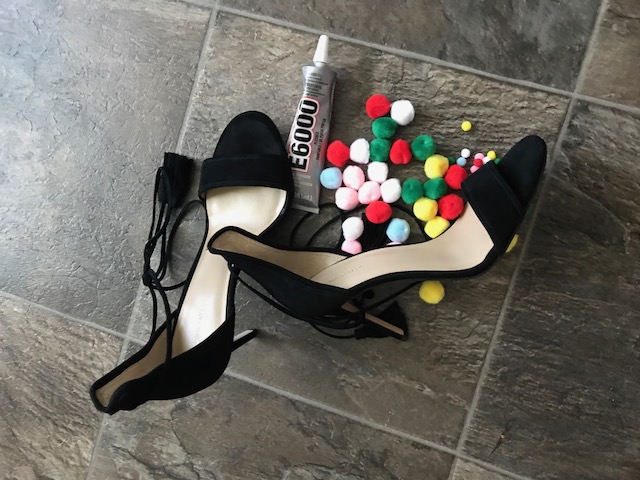
Goop Adhesive
Pom Pom Any Size You Like any Color (I used primary colors)
Ann Taylor Pumps (Now Sold Out) similar here and here


How to Create the Pom Pom Sandal

You don’t have to prepare your shoe for anything special. The Goop glue adheres to just about any surface.  Make sure you have a damp cloth near by and some alcohol swabs as the glue may leave stray marks on the shoe or your hands. Dab some glue directly to the pompom or directly on the shoe and press down on the surface. You can do a random pattern or a color coordinated pattern.

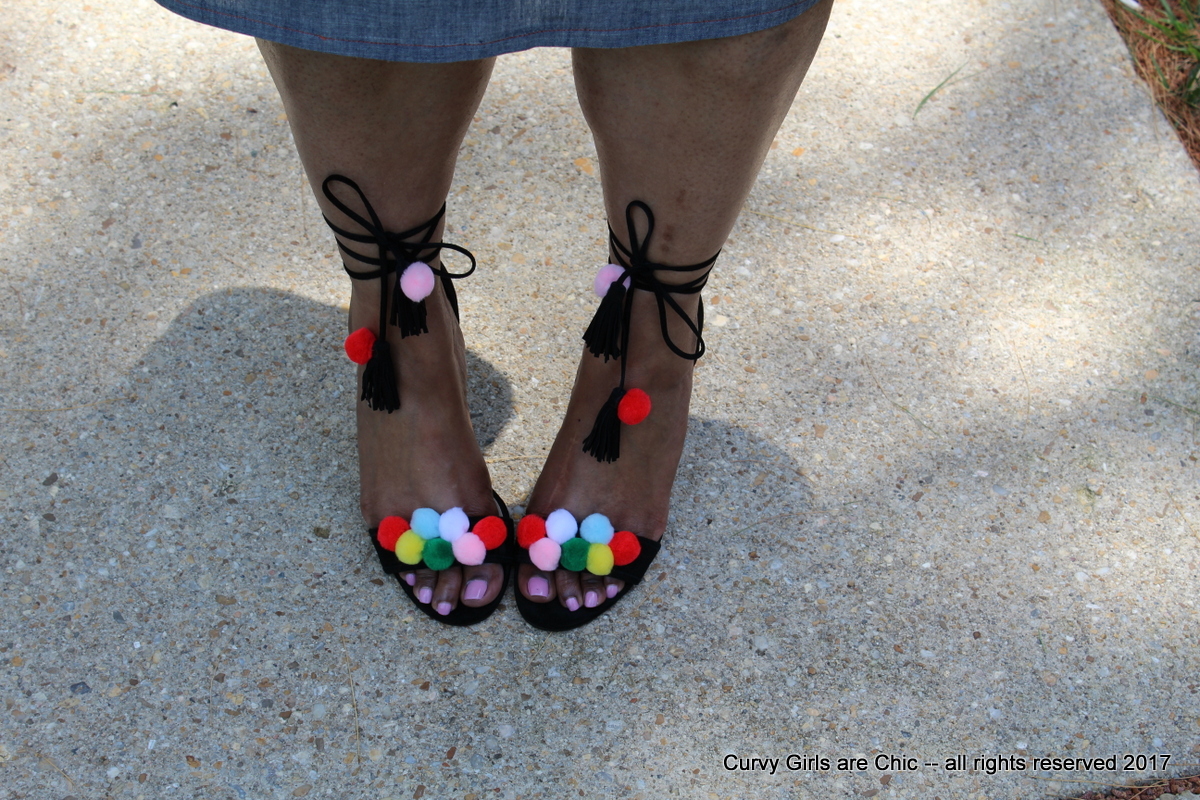
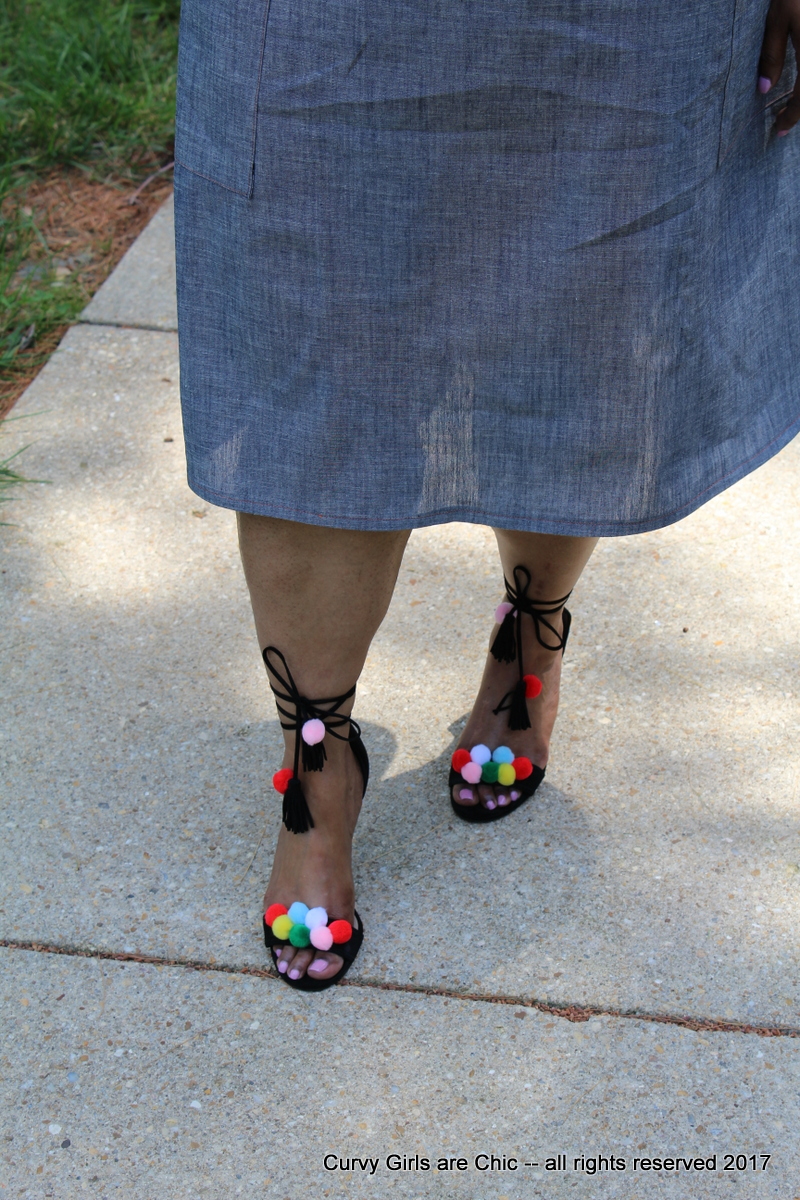
It dries in no time. I did wait a few days before I wore the shoes or moved them as I did want it be completely dry. I also added different color pom poms to the tassel for extra flair!
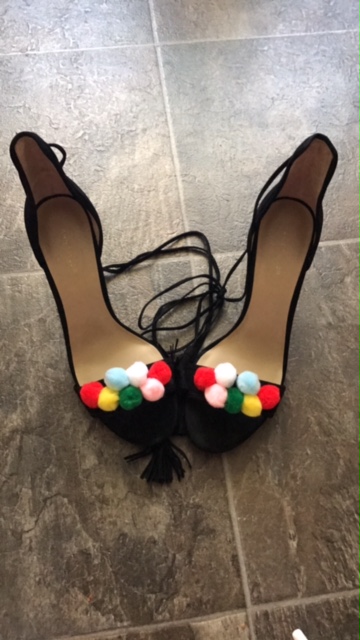


Eazy Peezy!

More Details!

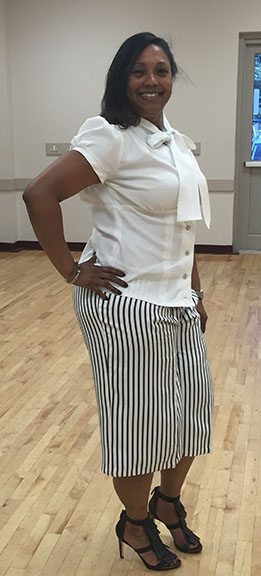
Dress Pattern: Burda 7225 OOP
Fabric: light-weight denim in my stash


Let me know how you like my shoes xoxoxo!

Fabricmart Fabricista Week 1 Challenge — Handmade Do-Over

The Week One Fabricista Challenge is done and ready to vote!

We had to take a project that was a “fail” and re-do the project.. I choose a pair of culottes below to “do-over.”

Tell us about the project 

Culottes made a comeback this summer although they never left some fashionistas wardrobe. I like them because they are in between the length of shorts and pants and most look similar to an A-line skirt because of its drape.  I purchased this black and white stripe fabric from Fabric Mart initially to create culottes and a blazer (an updated summer suit). When I received the fabric the stripe is horizontal vs vertical which I found challenging as the stripes when against the grain vs with the grain. So I decided to just create the culottes with Burda Pattern Burda Pattern 6812 I chose this pattern because they were not too wide or too slim.

Here is the situation: Initially when I took, the pattern out I said “these pattern pieces seem a small? I took my measurements against the pattern pieces and said hummm this says it will “fit” even with the ease. The one joy about sewing for yourself is you can fit before the garment is finished.. You can even stick one leg in one pants leg to see how it will go. Well yes, they “fit” but the fit is too tight! I also found it very challenging with the pockets, matching the stripe with the pocket yoke because a huge challenge.

Bad Fit 1


[spacer height=”20px”]

Bad Fit 2


[spacer height=”20px”]

Bad Fit 3

[spacer height=”20px”]


Craftsmanship / Do Over – I decided that I did not need the pockets, the show through the white fabric and it is not very attractive.  If you have white pockets in white pants, it should be done with “flesh-tone lining or fabric.” Therefore, I eliminated that.  I took the pattern pieces and compared them to another similar pattern and for sure this pattern is many times too small. The size 14 was bigger on the McCalls then this Burda.. I digress I still used the same Burda pattern, recut the pieces, widened the hips, raised the back rise, and I also added belt loops in case I ever wear them with a tucked in blouse. I also changed the front pleats – initially these culottes had one pleat but I divided the pleat in half, added a pleat (for two pleats), and placed the pleats directly on a dominant stripe.  I hemmed the pants with lace hem tape. The waistband and hemming were never completed in the first pair they just went to the corner of shame L

Good Fit Side View

[spacer height=”20px”]

Good Fit Back View

[spacer height=”20px”]

Good Fit 3

 [spacer height=”20px”]

Fit – The pants fit much better, there is no cutting in the crotch area, it is not pulling in the rear area and I have room to move in the waist and the hips.

[spacer height=”20px”]

Presentation

[spacer height=”20px”]

Vote for Me! Week 1 Challenge!

Burda 6765 and Burda Style #131 Tailored Pants

Happy Wednesday Darlings! Yes its me again can you believe it twice in one week whoo hoo for me!
I made this two piece crop top and pants for a birthday event I went to in Baltimore.  The event was for my sister’s pastor of The Greater Hope Worship Center. The party was held at the Baltimore Rowing Club this place is adorable close to the water great view and the weather was fabulous!
We had a great time and it was so good connecting back with my family I really missed! 
This outfit is two Burda Patterns: Burda 6765 and Burda Style Tailoring Pants.. What are the differences.. Burda Patterns sells retail paper patterns and Burda Style does strictly .pdf patterns.  Since I am one of their Top 50 Bloggers I try to use their patterns a lot more often.. plus they have great modern style.. the patterns are clean, classy, modern.. only downfall you have to print and tape it all together GRRRRRRRR… But the results are great.
Burda 6765 is a set of adorable tops that comes with a cap sleeve and long-sleeve with a V-neck.. You can definitely interchange the pieces but I liked the short cropped one this time. The only thing I found odd about this pattern is its cut wayyyyyy sha-medium (yes a new word when its in between a small and a medium and just does not fit urgh!
The first one I cut did “fit” but it really fit and it was not appropriate for this event plus my tummy ain’t set up right LOL The first one was cut in a size 10 and the second one I went way up to a 14.  The sleeves as you can see are still a bit tight which tells me that this is cut small. My arms are small and most sleeves are big and roomy this not so much but it wasn’t uncomfortable.  It feel to a nice length and is not too revealing.
The fabric came from Fabricmart on one of their cotton sales.. its cute fabric with a slight stretch and Swiss dots..
The pants came from the BurdaStyle.com Trousers 131 – very cute tailored pants that goes from size 17 to 21 which is meant for juniors.. Well Juniors aren’t working with the curves so I had to do my own thing with it. I always have to alter the crotch area and the rear area.. and most often the hips.. The length is fine, although I generally add 2 to 3 inches because I like my pants long as they elongate my legs vs. cut me off with too short..
There is no leeway with this if the pants are short they have to be capris, shorts, or long.. I have tried this a few times and although I’m 5’4″ I have a short waist and long legs.. certain lengths just don’t work.
This fabric though oh my this fabric! I got this beautiful Loose-Woven Black Cotton Jacquard I actually picked this up last year on one of Mood Fabrics fabric sales and 1/2 this price.. I got 5 yards and it really is nice!

Clutch Bag: Saks 5th Avenue
Shoes: Prada Flats (last season)
Watch: Michelle
Bracelets: David Yurman
Lip color: CHANEL Gabriella
Huggs and kisses xoxoxox

Tease Me with Teal!


I found this beautiful knit fabric in GStreet I knew I had to have it! It was the last three yards on the blot so of course being the #SewingGoddess I am I purchased it all 😉 I self-drafted the high-wasted skirt, the top is a combination of two patterns and the pants are Burda.  The pants actually came out a bit larger in the front and would need more adjustment.. but below are the alterations created for all three..
 
Top is a combo of two patterns Vogue 8877 for the top portion and for the sleeves I used from dress pattern Butterick 5211.
 
High-waisted skirt is self-drafted
 
Pants by Burda 7250 elastic in the bottom cuff versus the cuff of the original pattern.
 
Clutch DIY — Coming Soon


Chanel Coat Inspiration

When I saw this Chanel Coat in the online fashion show I knew I had to have it or I knew I had to make one like it. I was more than sure the cost of this coat would be about $4,200 whew too rich for me.. However, when the collection was released, I couldn’t wait until I found out the REAL Price :-O

Umm yeah that will never happen unless I hit the $455 Million Dollar lottery currently going on! Heck that price can purchase the Bernina 560 I need, two student machines and fabric for my ready-to-wear.. anyway I digress.. here is my actual creation from this inspiration..

This is a beautiful 100% Wool Tweed from Mood Fabrics I purchased mine at the store in New York but there is a similar one Here.  I used Burda pattern 7020 with the following modifications:
Added 2″ to sleeve and added a fringed self fabric band
Added a waist casing for the leather belt
I obtained the leather belt (which is simply a leather tie by the yard) from ToHo Shoji Trimmings in New York along with the Swarovski Balls on the end of the leather tie.
I loved making this coat! My client was so amazed when she saw it and want to purchase it from me..lol
Dets on the rest of the outfit:
Leather pants DIY (details coming soon)
Suede Hills with studs — JCrew
Ring DIY (details coming soon)
More coming soon 🙂

Verified by ExactMetrics