

Happy Birthday Booo Thang love u to pieces ??? (at Proud Mary’s Southern Cuisine)
Happy Birthday Booo Thang love u to pieces ??? (at Proud Mary’s Southern Cuisine)

 And it has begun lol #happybirthday
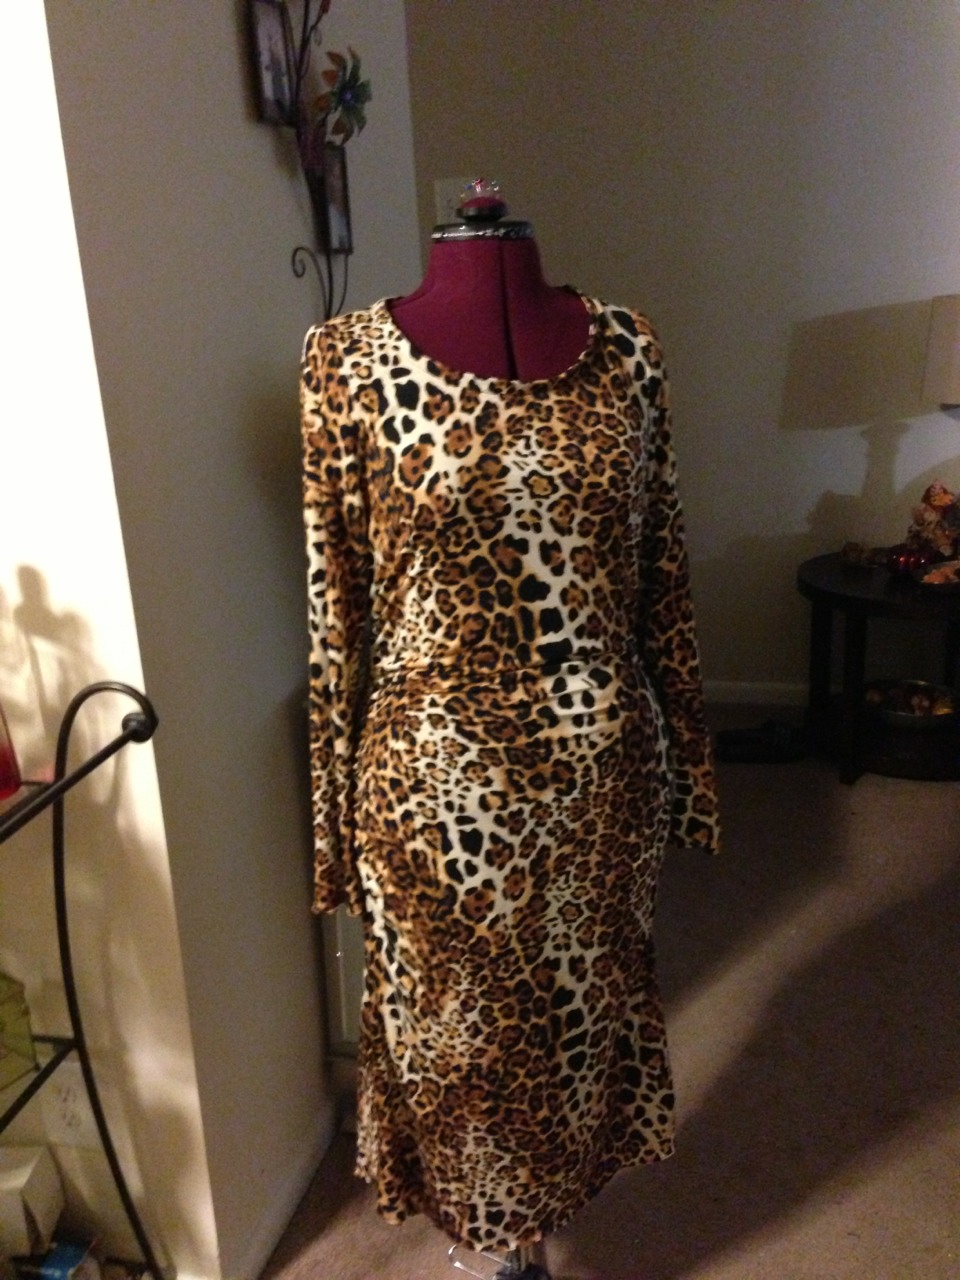

Of course when I go to NY I can never stay on course with my list.. I always vear away and purchase other and extra fabric lol the prices are just fabulous.. Anyway this leopard print fabric was obtained at MOOD Fabrics.. Its a beautiful crisp hand knit, but it is a bit on the thin side. I purchase another piece blended knit for the lining. The pattern was easy and it sewed quickly.. more details below.. Soon as I get to wear it I will post a photo..lol
Project Review Detailed
Pattern Description: One style of pullover, close-fitting dress. Designer – Tracy Reese
Pattern Used: Vogue 1314
Pattern Sizing: Cut a 12 for the top, 14 for the skirt
Did it look like the photo/drawing on the pattern envelope once you were done? Yes, just like it!
Were the instructions easy to follow? Yes, the instructions were clear.
What did you particularly like or dislike about the pattern? Nothing it constructed well
Fabric Used: 100% Boiled wool
Pattern alterations or any design changes you made: Had to alter the hip area
Would you sew it again? Maybe, I only wanted the pattern for this particular fabric.
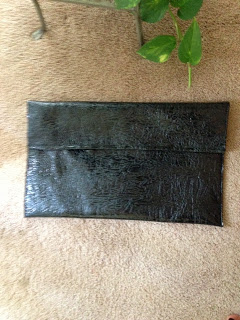


I am falling in love with the idea of creating things with leather. I found this piece of leather at G Street Fabrics in Rockville, Maryland. They are having a fabulous sale right now that can’t be passed up! In fact I am eyeing a Bernina machine that is on sale as well.. anyway I needed a good size Black leather clutch for a long time and to see this piece of patent embossed piece — was a must have. It was a really large piece in which I utilized a great space of it, I lined it with a cotton/silk lining and interfaced the lining versus the actual piece of leather. Although I did do a test piece of leather and I fused the interfacing to the leather, I thought it would be better to do the first option.
Stitching this required longer stitch lengths, and a walking foot. I used Gutterman’s polyester thread and a regular all-purpose needle.
I measured the size I wanted onto pattern paper, then transferred to to the leather, the interfacing, then the lining. I also cut a square lining pocket for the inside just to give it a more “professional look.”
I then measured the front 10” from the bottom and marked it with chalk, I stitched down that line. Then measured and marked another 10” to the back section and stitched down that line. The rest of 5” is the flap. I then stitched up each side 5/8, tacked each end. Then stitched around the flap, trimmed close to the edge of the stitching. I then cut a 1” strip the length of the flap folded it over and stitched across the edge just for decoration purposes.
I used fray check around all the edges just so the little lining threads do not fray. I will be looking for some other kind leather edge sealer to put on the sides.
Let me know how you like it .. subscribe to the blog or send me an email 😉


Look what just arrived from #saks #rachelroy #ankleboots #sexy wish they had a dust bag though love love love!


How ironic I am working on a Chanel like jacket and craftsy sends out a great article on here.. The woman the icon — Coco Chanel!