Tag: seamstress

Fabricmart Fabricista Week 1 Challenge — Handmade Do-Over

The Week One Fabricista Challenge is done and ready to vote!

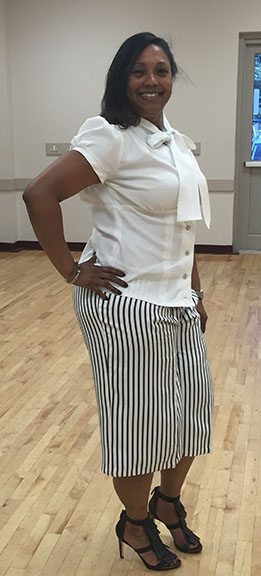
We had to take a project that was a “fail” and re-do the project.. I choose a pair of culottes below to “do-over.”

Tell us about the project 

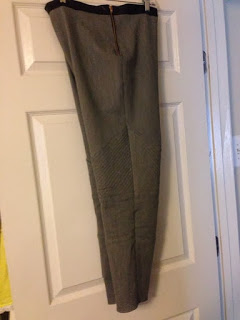
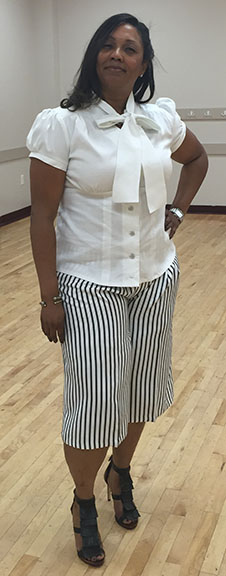
Culottes made a comeback this summer although they never left some fashionistas wardrobe. I like them because they are in between the length of shorts and pants and most look similar to an A-line skirt because of its drape.  I purchased this black and white stripe fabric from Fabric Mart initially to create culottes and a blazer (an updated summer suit). When I received the fabric the stripe is horizontal vs vertical which I found challenging as the stripes when against the grain vs with the grain. So I decided to just create the culottes with Burda Pattern Burda Pattern 6812 I chose this pattern because they were not too wide or too slim.

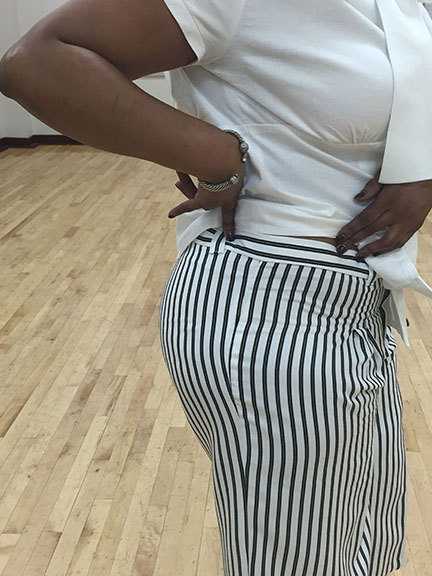
Here is the situation: Initially when I took, the pattern out I said “these pattern pieces seem a small? I took my measurements against the pattern pieces and said hummm this says it will “fit” even with the ease. The one joy about sewing for yourself is you can fit before the garment is finished.. You can even stick one leg in one pants leg to see how it will go. Well yes, they “fit” but the fit is too tight! I also found it very challenging with the pockets, matching the stripe with the pocket yoke because a huge challenge.

Bad Fit 1


[spacer height=”20px”]

Bad Fit 2


[spacer height=”20px”]

Bad Fit 3

[spacer height=”20px”]


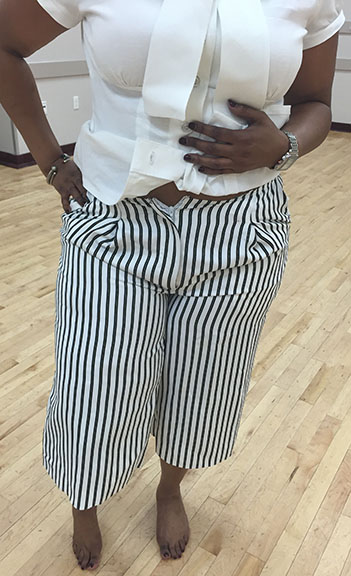
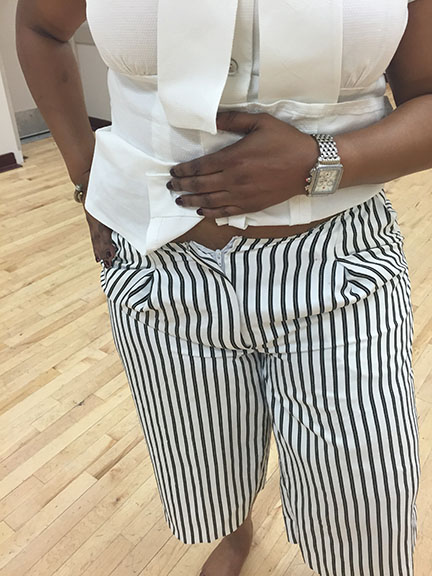
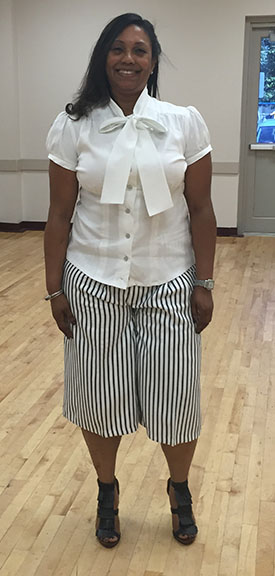
Craftsmanship / Do Over – I decided that I did not need the pockets, the show through the white fabric and it is not very attractive.  If you have white pockets in white pants, it should be done with “flesh-tone lining or fabric.” Therefore, I eliminated that.  I took the pattern pieces and compared them to another similar pattern and for sure this pattern is many times too small. The size 14 was bigger on the McCalls then this Burda.. I digress I still used the same Burda pattern, recut the pieces, widened the hips, raised the back rise, and I also added belt loops in case I ever wear them with a tucked in blouse. I also changed the front pleats – initially these culottes had one pleat but I divided the pleat in half, added a pleat (for two pleats), and placed the pleats directly on a dominant stripe.  I hemmed the pants with lace hem tape. The waistband and hemming were never completed in the first pair they just went to the corner of shame L

Good Fit Side View

[spacer height=”20px”]

Good Fit Back View

[spacer height=”20px”]

Good Fit 3

 [spacer height=”20px”]

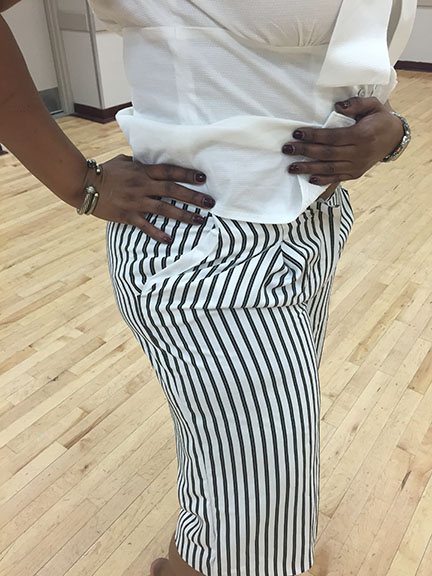
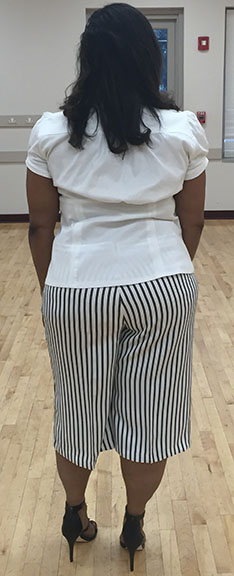
Fit – The pants fit much better, there is no cutting in the crotch area, it is not pulling in the rear area and I have room to move in the waist and the hips.

[spacer height=”20px”]

Presentation

[spacer height=”20px”]

Vote for Me! Week 1 Challenge!

Chanel Coat Inspiration

When I saw this Chanel Coat in the online fashion show I knew I had to have it or I knew I had to make one like it. I was more than sure the cost of this coat would be about $4,200 whew too rich for me.. However, when the collection was released, I couldn’t wait until I found out the REAL Price :-O

Umm yeah that will never happen unless I hit the $455 Million Dollar lottery currently going on! Heck that price can purchase the Bernina 560 I need, two student machines and fabric for my ready-to-wear.. anyway I digress.. here is my actual creation from this inspiration..

This is a beautiful 100% Wool Tweed from Mood Fabrics I purchased mine at the store in New York but there is a similar one Here.  I used Burda pattern 7020 with the following modifications:
Added 2″ to sleeve and added a fringed self fabric band
Added a waist casing for the leather belt
I obtained the leather belt (which is simply a leather tie by the yard) from ToHo Shoji Trimmings in New York along with the Swarovski Balls on the end of the leather tie.
I loved making this coat! My client was so amazed when she saw it and want to purchase it from me..lol
Dets on the rest of the outfit:
Leather pants DIY (details coming soon)
Suede Hills with studs — JCrew
Ring DIY (details coming soon)
More coming soon 🙂

Photo Shoot Sneak Peek!

Well my photo shoot finally took place yesterday and at first I wasn’t nervous.. ah it will be a cinch.. I have done some modeling before .. But  I was a lot younger then! We shot about 5 outfits and it took about 4 hours.. I never knew it would take so long and standing in heels in and out of changes was a bit grueling.. Now I know why they are top models.. then you must totally listen to your photographer and tune out outside interference was not easy.. You have to stand straight, shoulders back, head up hair perfect lipstick on smile big pose no leg more leg soft hand.. dern whew thats a lot.. But I had fun and I would do it again.. I felt so special for the day!
This is photo is a sneak peek of one of the photographers that snapped me with my own FujiPix S4400 humm came out pretty dern good!
This dress is a Vogue pattern with shirring on the side, the fabric came from Mood Fabrics (one that was not on my list) but I saw it and had to have it. I originally planned to create a top but I think the dress came out much nicer! The whole shoot is coming with shoes and all but I just couldn’t wait to share this!

Snake skin printed leather clutch #diy #leather #clutch #seamstress #sewinggoddess #picoftheday #madeforme picstitch (at **The Hideout**)

I visited the Tandy Leather Factory last weekend to see what options were available to create a variety of clutch bags.  The place was quite lovely and the representative there “Prince” was extremely helpful.  He explained what leathers could be dyed and which could not.  He showed me the different dyes, glues, and finished and provided a huge variety of sale leathers.  The result is this fold over clutch in printed snake skin leather.  Its a great weight so I did not need much stabilizer, the result is a stabilizer, a heavier weight cotton, and the leather — love love love!

Too low too much to show!

Ok so here are the jeans that turned out OK except.. the fact that its way too low in the back! There are some other issues that appeared that I will describe below:

Pattern used: McCalls OOP 6404 slender legging pants in four styles
Fabrics used: Stretch Grey Denim from fabric.com with leather trim obtained from Michael Levine.
Pattern alterations: I took the front leg piece and divided it into four other pieces and quilted the top piece in the front and the back. I only altered the back piece into two pieces, added a gold metal zipper, and a leather band.


What should have been done:
Crotch area made higher in the back, bottom pants piece made at least three inches longer and slimmer at the bottom, the waistband increased by at least two more inches, and keep the metal zipper insertion.

I will make the pants again perhaps in another color or the same grey denim but applying the mentioned alterations.

Update: it was suggested that I remove the leather band, add a yoke with the left over quilted pieces I have and add a new leather band but larger.

Verified by ExactMetrics