Category: Curvy Girls are Chic

Kids Summer Sewing Camp! July 19 to July 23, 2021

Welcome to the Summer 2021! Whew last year was a doozey! But this year we are back to normal.. Kids bored.. they want to learn a new skill send them to Summer Sewing Camp for the week. Camp begins on Monday 7/19 and ends on Friday 7/23/2021! T

This camp is for beginners and intermediate! They may sew and complete any of the following things.. a pillow, tote bag, bucket hat, a skirt, or shorts! If they don’t complete their project they can continue with the next sewing camp in August or continue with Saturday Kids Beginner / Intermediate Classes!

Camp is for ages 8 through 14.. and we have all the tools necessary for a nominal fee and is paid at the end of class.

We have two slots for July available and four slots for August Sewing Summer Camp. You will find all the information for the class in the links I have included in this newsletter.

Also to let you know the shop is closed on 7/15 and the 7/16 as we need to complete our taxes with the I, the R, and the S..

If you need something in the store, I have included a 10% off coupon that is good until Sunday July 18th! Use the code WJYRR

Happy Sewing and see you in class!

New Retail Store and Instruction Lounge!

New Retail Store and Instruction Lounge!

2020 was filled with quite a few highs and many lows! We made it through tho!

In 2020, I moved my business from my apartment into a studio in Mount Rainier right after loosing my full-time job! The opportunity landed in my lap to move my sewing business to full-time and build my way to a “real store!” This was always a dream of mine.. to leave a legacy for my children.. The studio opened then COVID hit.. urgh.. it was instant mask making time for the next two months!

Mask Making 2020

Within those two to three months I made over 1500 masks! It was exhausting.. but I learned a lot in a short amount of time!

As the months wore on I kept building and building.. then in November I received devastating news that I needed to move so the persons I was subleasing from could expand their business.. sure it was fun being evicted in the middle of the pandemic.. but I turned lemons into sweet tea and I also gained a much needed assistant and she kept me sane..

Business Building

In February 2021, almost a year to the date I moved into a new retail space less than one mile away from the studio also located in Mount Rainier… it was exciting and stressful at the same time! I literally ate through all of my savings with deposits, purchasing things, new items for the store and I’m still spending all while there was little no business coming in.. Most classes last weeks and I couldn’t start my students than stop them..

We had to build it all – paint, new shelving, new tables.. refresh the sewing machines.. build the classes and the most difficult part – waiting on Prince George’s County to grant permits 🙁 it took over two months… in fact still waiting on one part of the permit.. but at the very least the city of Mount Rainier has approved our city Use and Occupancy permit!

We aren’t done yet.. but here is a snapshot of the inside retail portion of the store.. We are now open for Retail Shopping and to book more classes!

We still need help though as help is still moving slow from the SBA.. and we need to fill classes!

Help Me GIFs | Tenor

We still have private classes and general classes listed below..
Groupon Coupons
Kids / Teen Classes
Bra Making Workshops Day and Weekend Workshops
Jean Making Workshops..
And our regular beginner through intermediate classes – for kids and adults


Thank you for reading and hanging in there with me all these years.. its not easy.. trying to keep up with social media, sewing for myself, and people. I hope the building part is dwindling down so we can get back to promoting and generating sales..

If you are in the area please stop by and say hi! Please share my post with others to let them know I am still here!

Donna and Liz

XOXOXO

Black History Month and Cricut Infusible Inks

This is a sponsored conversation written by me on behalf of Cricut. The opinions and text are all mine.

Hello and Happy New Year Welcome to 2020 and new decade!

February is  here and a very special month for me as an African-American as we celebrate Black History. Although I celebrate all year long there is extra emphasis in February.  This year I was chosen to partner with Cricut in celebrating Black History Month with this project using Cricut Infusible Inks!!

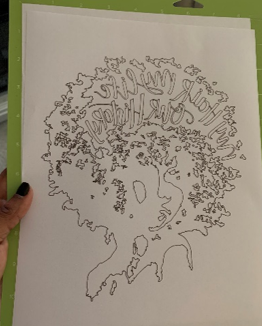
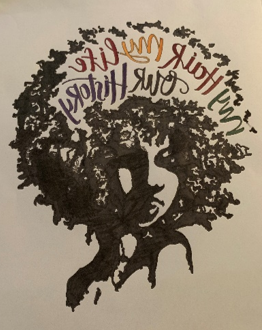
The image I chose of of a African-American women celebrating our crowns! This post will also introduce us converting an image to line drawings for use with Cricut Infusible Inks.

Materials Needed for this Project:

Lets Get Started!

1. Open Cricut and choose a new project

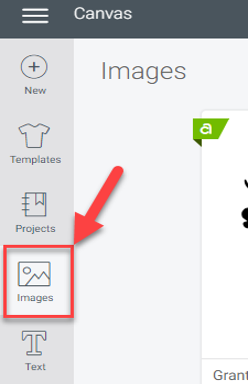
2. Once in the new project, navigate to the left and choose images

3. In the images search bar type in your search keywords mine are “Black History Month”

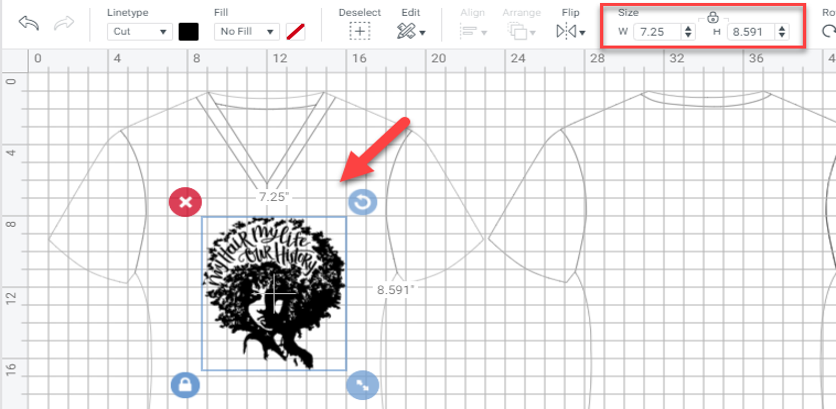
4. I choose the image “My Hair My Life My History” – I also went to templates and choose a T-shirt to see exactly how it would fit on the T-shirt.
5. Size you image to fit on the Laser paper, I sized mine to be 7.25 x 8.5.

6. Once the image is in place navigate to the menu bar and locate “Linetype”

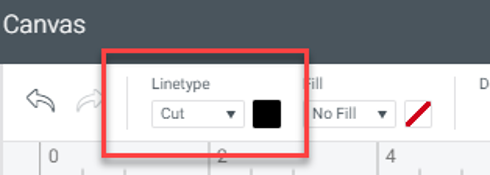
7. In the drop down chose “Line type” and it instantly changes your drawing into line drawing.


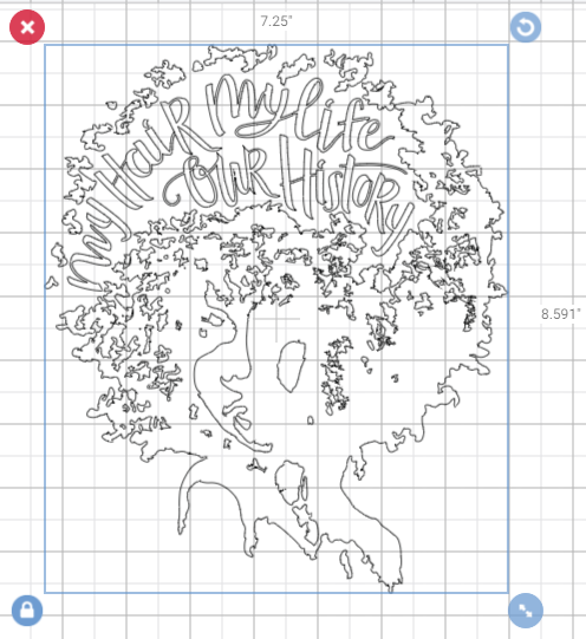
8. Save it then send it to “Make”
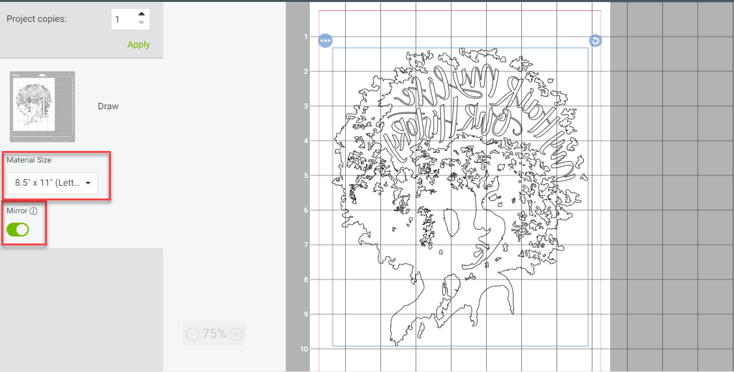
9. Change your canvas size to 8.5” x 11” and mirror your image


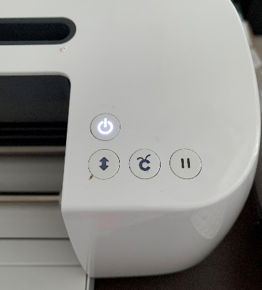
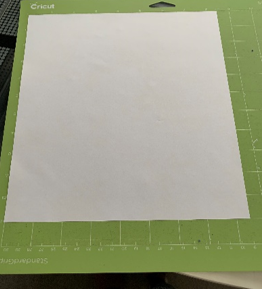
10. Turn your machine on then click continue. Let your machine connect then choose copy paper.

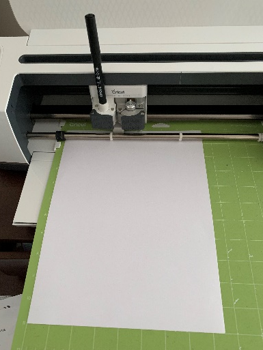
11. Insert the Infusible Ink black .04 point pen into the first on the Cricut Maker and Press Go. The pen will create an outline of the image above that you can then color in with the other Infusible Inks that you wish.

12. One the image is done carefully peel the copy paper and the image off the mat. Place the paper face down and peel the mat versus peeling the paper from the mat.

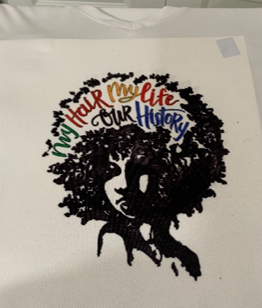
13. Color in your image as you wish.. (Do not be afraid to apply color. The more the color is applied the richer your image will be. Also let it sit and go back over your colors for more saturation.)

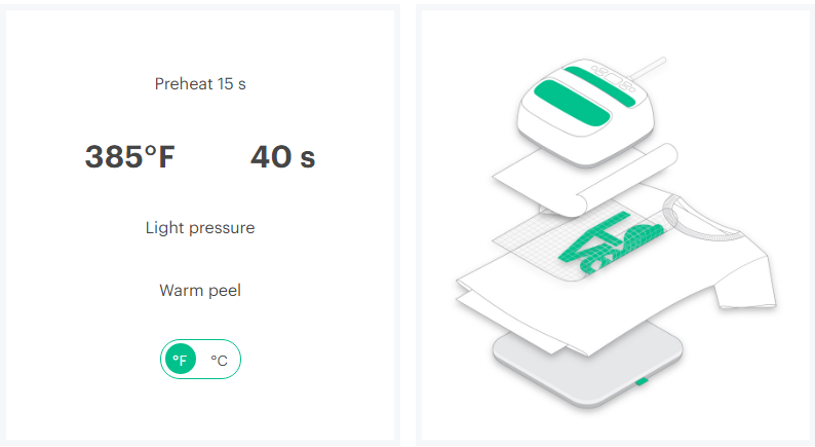
14. Once you are done with color turn on your EasyPress 2 – in the 9 x 9 size as it’s the perfect size for T-shirts. If you forget the settings you can go to the Cricut Website Here and choose your materials and medium and it will reveal the settings: https://cricut.com/en_us/heatguide

15. For the most successful transfer there is a stacking order:
Place the EasyPress Mat down first on a heat proof setting preferably your iron board.
Inside Cricut T-shirt Blank:
Place a piece of White Cardstock (80 lb) or 4 layers butcher paper (the cardstock absorbs the ink)
Infusible Ink Pen / Marker design, face down
Butcher paper – Absorbs the ink (alternatively you can use brown paper, you will not be able to re-use it) – Results once your image is pressed

Cricut EasyPress 2

16. Be sure to use the specific recommended heat setting for each material you use. For instance: the heat settings are 385 degrees and 40 seconds and light pressure for a shirt but the settings are 400 degrees and 240 second and no pressure for the ceramic coasters.

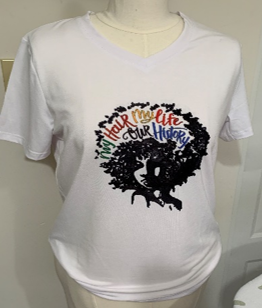
17. Once the image has cooled you may lift the butcher paper and reveal your beautiful project!

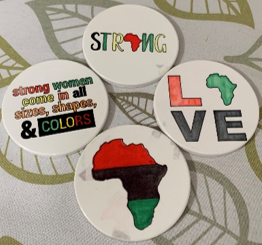
I did some coasters as well!

Friendly Tips and Reminders!

  • Do not hesitate to read the instructions several times
  • Do use the specific materials as indicated – laser paper, Cricut Infusible Inks, Cricut shirt, butcher paper (or brown paper), card stock, and Cricut EasyPress 2.


“This blog accepts forms of cash advertising, sponsorship, paid insertions, and / or other forms of compensation. The compensation received may influence the content, topics or posts made in this blog. All advertising is in the form of advertisements generated by a third party ad network. Those advertisements will be identified as paid advertisements.”


de945714fa746b54af1f32a46e195ef078cdf643d74fc07dee

Dream Fit Bras are a Dream!

Hello blogger babies!

Recently, I was asked to do an #ad #promotion for Dream Fit Bras. Dream Fit bras have a size range that begins with size 38DD and goes to 46DDD depending on the style of the bra.

Dream Fit Bras Display

Dream Fit Bras Selection

Online they have a great selection of bras in a wide range minus the bells and whistles.  There is a good selection in the stores with Wal-Mart being the largest retailer.  I had a model friend try a few bras on and she admired the fit and she said it felt like a “dream” but she was not confident enough for me to photograph her for this blog post 🙁

Some of her quotes were; “Wow, this feels great,” “I don’t want to take it off,” and “I love how it looks under my shirt.”  Although, she did not her photograph taken she was happy to keep the bra I purchased for her for her time and consideration.

Dream Fit Bras Benefits

Dream Fit offers six different styles: Deep Plunge, Back Smoothing T-Shirt, Multi-Way Plunge, Convertible Balconette, Stretch Cotton Plunge, and Feather Light. Quite frankly, I wish the back smoothing version came in my size as sometimes you did need to smooth out a few little bulges LOL!

All of Dream Fit’s bras are made with five key factors that create a great fitting bra:

  1. Contour cups for superior breast shape and modesty;
  2. Deep neckline without sacrificing coverage;
  3. Wide bra straps to distribute weight evenly;
  4. Center gore lies flat against the breastbone for comfort; and
  5. A wider lower band provides the primary support.

Dream Fit Bras Display

Finally great fitting bras, for girls with curves and I have to say I am very happy that there is more  bra selection and with a price tag that won’t break the bank.. and guess what! There is a fabulous Giveaway for you! (4) women will win $250 Wal-Mart Gift cards and 10 other winners will receive a free bra of their choice! Just click the link to win!

#findyourDREAMFIT #hellobeautiful

XOXOXO

Dream Fit Bras Promo


https://ooh.li/2bb44e0

DIY Aquazzura Like Pom Pom Sandals


For the past few seasons, pom pom sandals have been the rave! Luckily, it does not appear this rave will go away anytime soon! We.simply.love.them! They are a great addition to any wardrobe whether they are flats, mid-heel, or high heels.

Aquazzura was one of the first designers to re-introduce these to the fashion world followed by Sam Edelmen with a lower price. I purchased the Sam Edelman flats in the neutral color last season, here they are shown in a sailor blue.  I purchased them last year for $100 bucks and they were worth it.

This Spring, I looked at a pompom in a slightly higher heel and did not find quite what I was looking for without spending fabric money! So I thought, why couldn’t I do this myself? I mean I am the Do it Yourself Queen and all Queens must wear the crown proudly. I skimmed a few blogs and YouTube videos for the “DIY” versions and it is so super simple — just some glue and some pom poms! Follow the instructions below so you can have a pair as well!

Do it Yourself Instructions

Goop Adhesive
Pom Pom Any Size You Like any Color (I used primary colors)
Ann Taylor Pumps (Now Sold Out) similar here and here


How to Create the Pom Pom Sandal

You don’t have to prepare your shoe for anything special. The Goop glue adheres to just about any surface.  Make sure you have a damp cloth near by and some alcohol swabs as the glue may leave stray marks on the shoe or your hands. Dab some glue directly to the pompom or directly on the shoe and press down on the surface. You can do a random pattern or a color coordinated pattern.

It dries in no time. I did wait a few days before I wore the shoes or moved them as I did want it be completely dry. I also added different color pom poms to the tassel for extra flair!


Eazy Peezy!

More Details!

Dress Pattern: Burda 7225 OOP
Fabric: light-weight denim in my stash


Let me know how you like my shoes xoxoxo!

Mother’s Day Skirt McCalls M6842

Happy Mother’s Day!

Flower Skirt M6842

Mother’s Day Skirt M6842

For this project, I used two fabrics.  The fabric used is from A Fabric Place in Baltimore. The bottom layer of fabric is navy blue taffeta.  The top layer of fabric is an embroidered tulle with 3-D flowers in red, pink, and orange. When I saw this fabric a few weeks ago I had to have it. I also did a preview of this fabric on Instagram when Sewing Design School did a monthly photohop and asked us to post #fabrictoafraidtocut!

I generally do not have a fear to cut fabric, it’s fabric, I control it I won’t let it control me! The only part that I did have a slight fear of is wasting the precious petals of the fabric and or cutting it in the correct direction.  I used the larger group of petal pieces as they actually went across the grain of the fabric. The more cascading petals were near the end of the fabric on the left side of it. I have a good portion of pieces left over that I refuse to discard. Perhaps I will add them to a clutch or a cool T-shirt to add some flare!

Here are more photos!

As you can see I did not hem the tulle, it does not fray.  However, the placement of the petals are uneven throughout the fabric it was almost impossible to hem as I would remove a great deal of the petals!

Close up of the embroidery on the fabric!

The wind was really whipping after dinner yesterday I am pretty sure quite a few got a peep show downtown Baltimore as my niece took my photos..lol

Do you like my shoes?

I will provide more details on these later this week, they are a combination of a store-bought shoe and a do-it-yourself added accessory!

Pattern McCalls 6842
Fabric: A Fabric Place in Baltimore
Top: Zara
Necklace: JCrew Factory
Lipstick: Tom Ford Cherry Lush Lipstick
Nail Polish: Essie Satin Sister


#ad This post does contain affiliate links, not sponsored links. All recommendations on this post are recommendations of Curvy Girls are Chic and are not sponsor or paid for by any sponsor.

Verified by ExactMetrics